As I was putting my tools away the sunset on Friday evening begged me to grab my camera and capture this moment. It has been a really good week with lots of progress on the project.
The black hole in the garage wall is a hole I cut earlier in the week at the exact spot where the major beam goes into the workshop. I then ran a string at the correct height between the garage and house and squared the new building at approximately 92 inches above garage floor... which is where the bottom of the main beam will rest. I had to trim off a few rebars that were too high so the beam can set on the top of the concrete. When I squared the building I was able to confirm that the distance between the beams was 22' 8" outside to outside in the main area where there is no cantilever sections. This gave me great comfort, as I had ordered the LVL laminated beams and truss joists... and for the most part they are going to come 23 feet... and I can then trim them to fit.
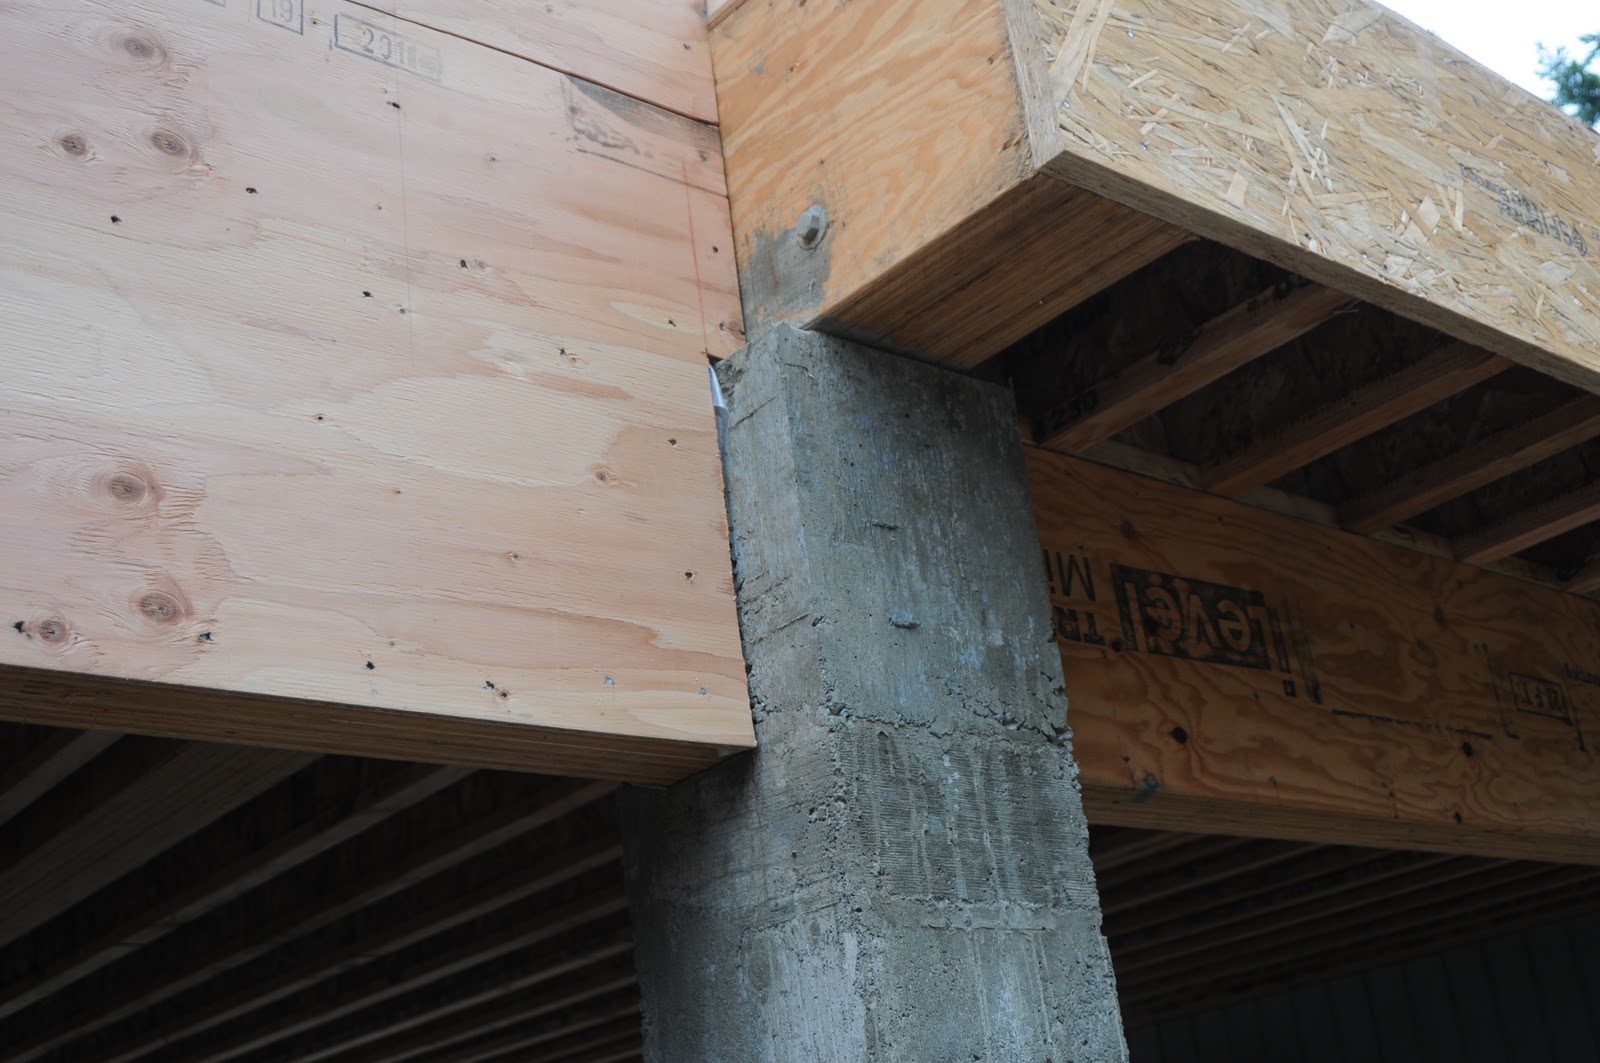
When we first conceived expanding the studio over a part of the garage, we thought we would have metal or a wooden posts to hold everything up. But after talking to engineers about the project, Brian, my friend in Phoenix suggested I consider a concrete post with rebar inside. As this soon became the most advantageous system we forged ahead with it. But when I went to put the rebar cage into the hole I first realized that there was less than 8 inches between the overhead door tracks on each side of the common wall. Once I removed a section of the wall it became very clear that I could not run an 18" or even a 13" concrete post between those overhead door tracks. So in consultation with Ritchie Smith, my engineer, we came up with a modification at the top. It meant bending the 5/8" rebars near to the top and making a notch in the post for the door tracks. These are things that come up that one never imagined would be a problem. Hence, I am making the concrete post a full 18" of concrete up to the bottom of the overhead door tracks. The whole place may fall down, but this post is huge and has a great foundation.

Friday Shirley made a gravel run for me... and I hope that will finish off the concrete stage. Along with the Navy Jack she brought another six bags of cement... which brings our total to date to 50 bags, if I use all that I have recently purchased. So far 32 bags have been used.
If you look closely behind the bags of cement there is the 18" x 18" form for column #1 in the garage. We poured the bottom half, up to the cleat on the form this past Tuesday... and today I added the top half without stripping off the bottom... and we will put concrete in the balance on Sunday. It will not be easy to get this one done since I have to work between the existing trusses in the garage.
You can see column #2 in the background. We also poured concrete up to 6" above grade on Tuesday. This is the rock ledge height for this column. From here to the top the concrete will be 13" square, leaving me 2.5" for rock facing.
We also poured the bottom part of the column #4 on Tuesday, which matches #3 for height to rock ledge.
On Thursday when I was excavating for #6 (the stair foundation) I dumped three loads of dirt removed from there into #2. I then had Shirley come with a garden hose and I brought several loads of fill dirt that I had stock piled and we completely backfilled #2. I doubt there will be much settling as Shirley really soaked it good and I threw in lots of rocks. Does it ever feel good to have that huge excavation backfilled... and we even dressed the top with crusher chips... my favourite road and yard gravel topping.
Again you can see a yellow string at the top of the columns... this is part of the squaring the building exercise. The laser level on the tripod makes finding the correct height of the column pretty easy
It won't take much to backfill #4 on Sunday. We developed a good solution to prevent settling of the driveway, which has some serious undercuts to fill in. We found using between 1 to 1.5 shovels of cement to 15 shovels of dirt and rock makes a very solid backfill... with no shrinkage. It worked really good on #3 the week before.
No. 3 was about 40 inches of backfill and using the reduced cement formula in a soupy mix not only filled in all the cavities, but there has been no noticeable shrinkage.
The nice pile of gravel in the background will go into foundation #5 and #6... plus the tops of the columns... and then we are done with concrete.
I finished forming the walls of the foundation in #6 this week and by Sunday evening I hope this will have concrete in it. The cross bracing looks kind of honky... but with only one side formed with plywood and the other side dirt walls, I had to come up with some way to keep the walls straight under the pressure of concrete.
Foundation #6 is for the stairs and the wall adjacent to the house that will support the second story walls and roof rafters.
I removed a few more boards of siding in two places this week... where 3" x 8" posts will go to carry the wall and roof load.
Each rebar that attached to existing house has epoxy in the hole. Two horizontal footing bars... and two vertical foundation bars.
I took half a dozen photos of this footing and foundation preparations and emailed them to my engineer... hoping to hear back with a green light so I can pour concrete footing here this weekend. My concrete mixing helper goes back to school after the weekend.
The last one... #7 foundation for the pantry came out really good. My careful cutting of plywood to follow the contours of the pavement payed off. My home made anchor blots worked out just fine. I am now ready to set up the floor joists... but I still await another quote so that I can decide who will be supplying the lumber and plywood.
This coming week on September 8 we are scheduled to get delivery of the beams and TGI's. It will be interesting to see if they can be delivered on schedule. Soon or very soon we will be done with concrete and on to bigger and better things... but without a good foundation the rest would be in vain.
I enjoy telling people that this house was built according to the Bible... it has been built on the solid rock! ...and we have cut no corners on the excavation, concrete or steel. So we expect that our new addition is designed to withstand the high winds, heavy snow load and even earthquakes, if they should happen. Fortunately we do not get hurricanes here... even though some days it sure feels like it!
But I did talk to a lady at the stock brokers office this week who said her name was Irene. I jokingly asked her if she got much abuse because of the hurricane last weekend... and she said she sure did... it comes with the territory.