Saturday, May 16, 2015

Back On the Rocks

I replaced my DeWalt Tile/Rock Saw... my old one had so many problems it was a total write off. So  I bought a used one and now again I can cut stone. Before mixing any mortar I worked most of a day just cutting and shaping the stones that I was going to use.


This was after two days of working on this post. This is only a part time job, as I still had to do all the housework, cooking and yard work this week, with Shirley being gone.  Every day I spent a couple of hours doing mowing, line timing and yard clean up... this is to help get my exercise level high enough for optimum blood scores... which by the way are doing really good.

Notice on the floor behind the column the square of stones laid out...


I prepared these to fit perfectly, and then set them off so I can put the mortar for them.

The sting lines look like they are not in the right place from this angle, but when you see it in context you will see they line up with the face of each side of the post.


This shows the chipping I do to soften the look of rock... taking off the sharp edges of stone that is cut with the saw.


This is what it looks like after knocking off the sharp edge.


And this is how I made sure the rock stayed put until the mortar was set.  Don't have to do that with the horizontal stones.


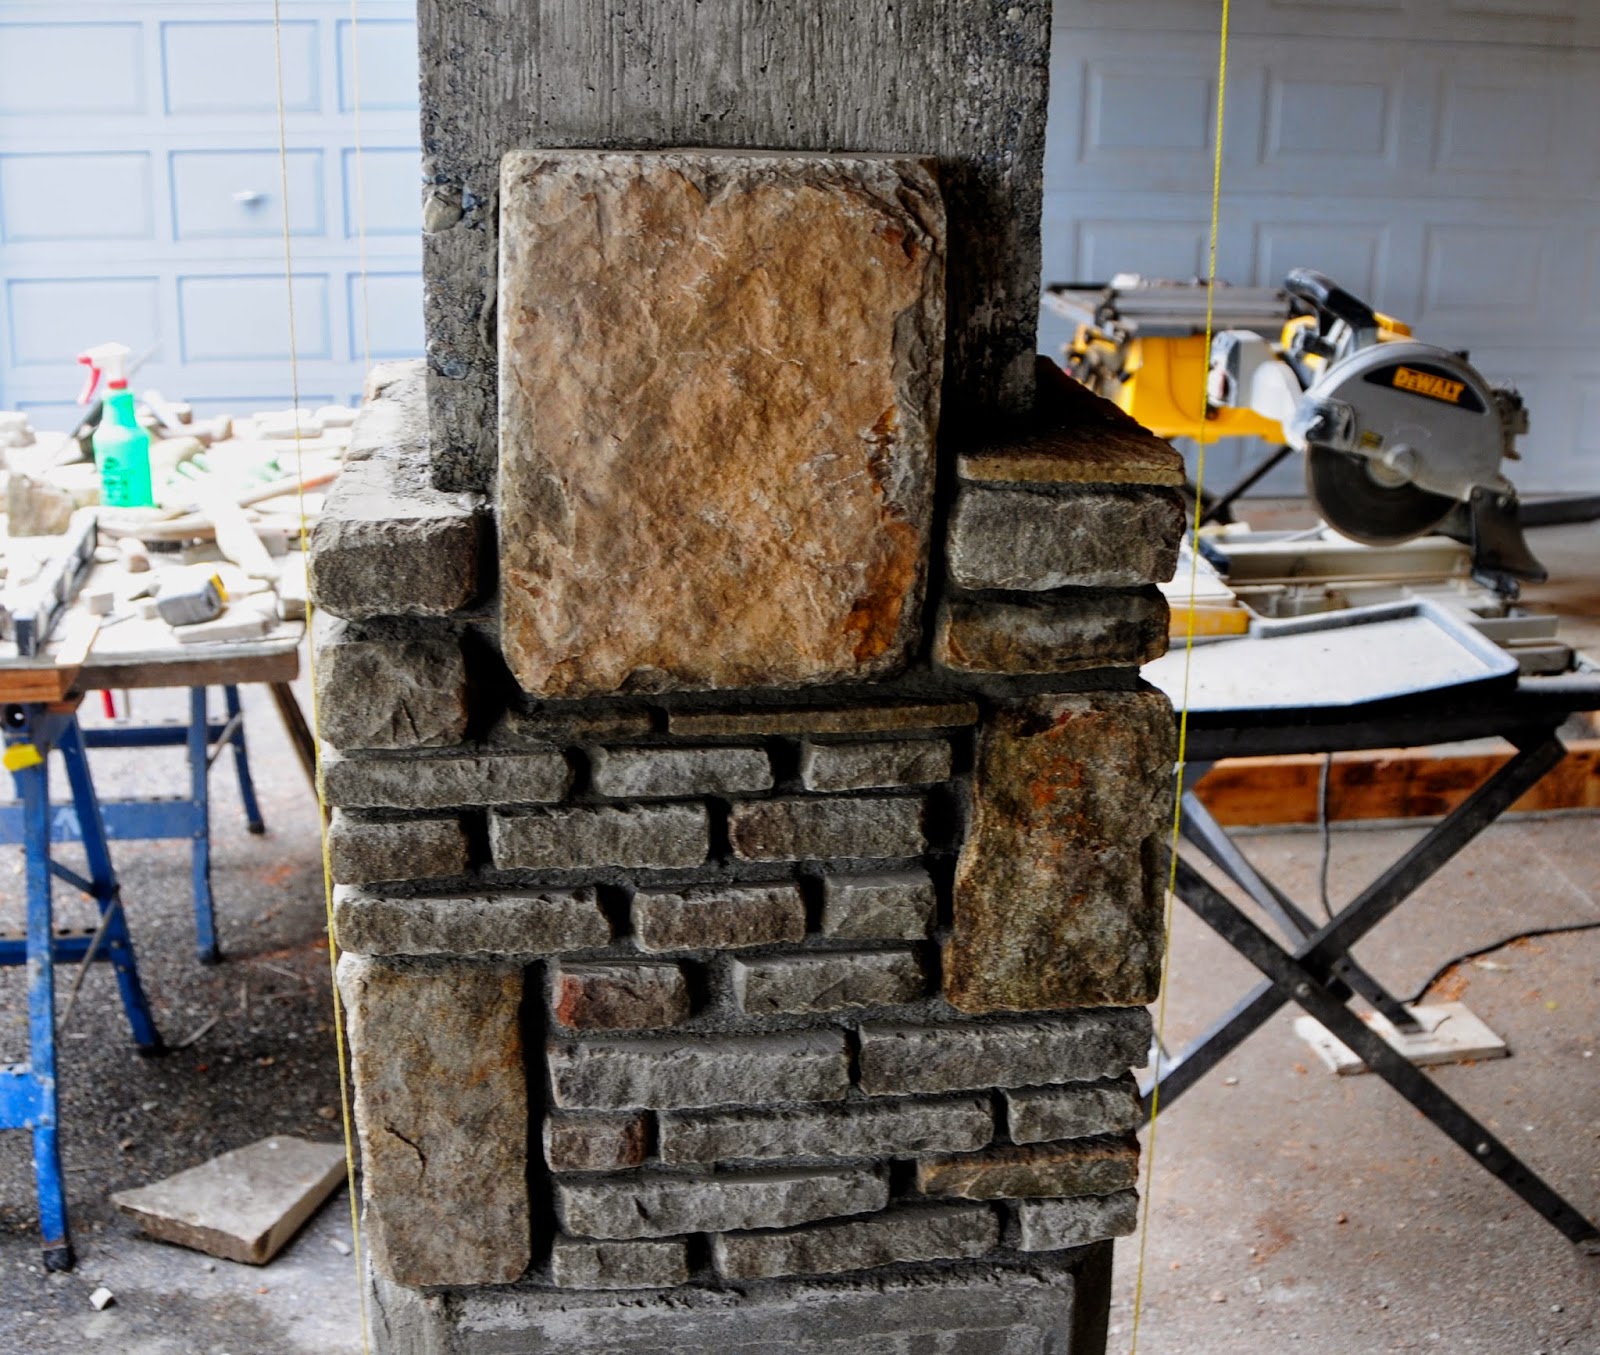
This is what this stone looked like at the end of yesterday.  You can see that I have taken the sharp edges off all the stones, regardless of size... it is kind of like the look of tumbled marble... which you may know is crazy expensive. 


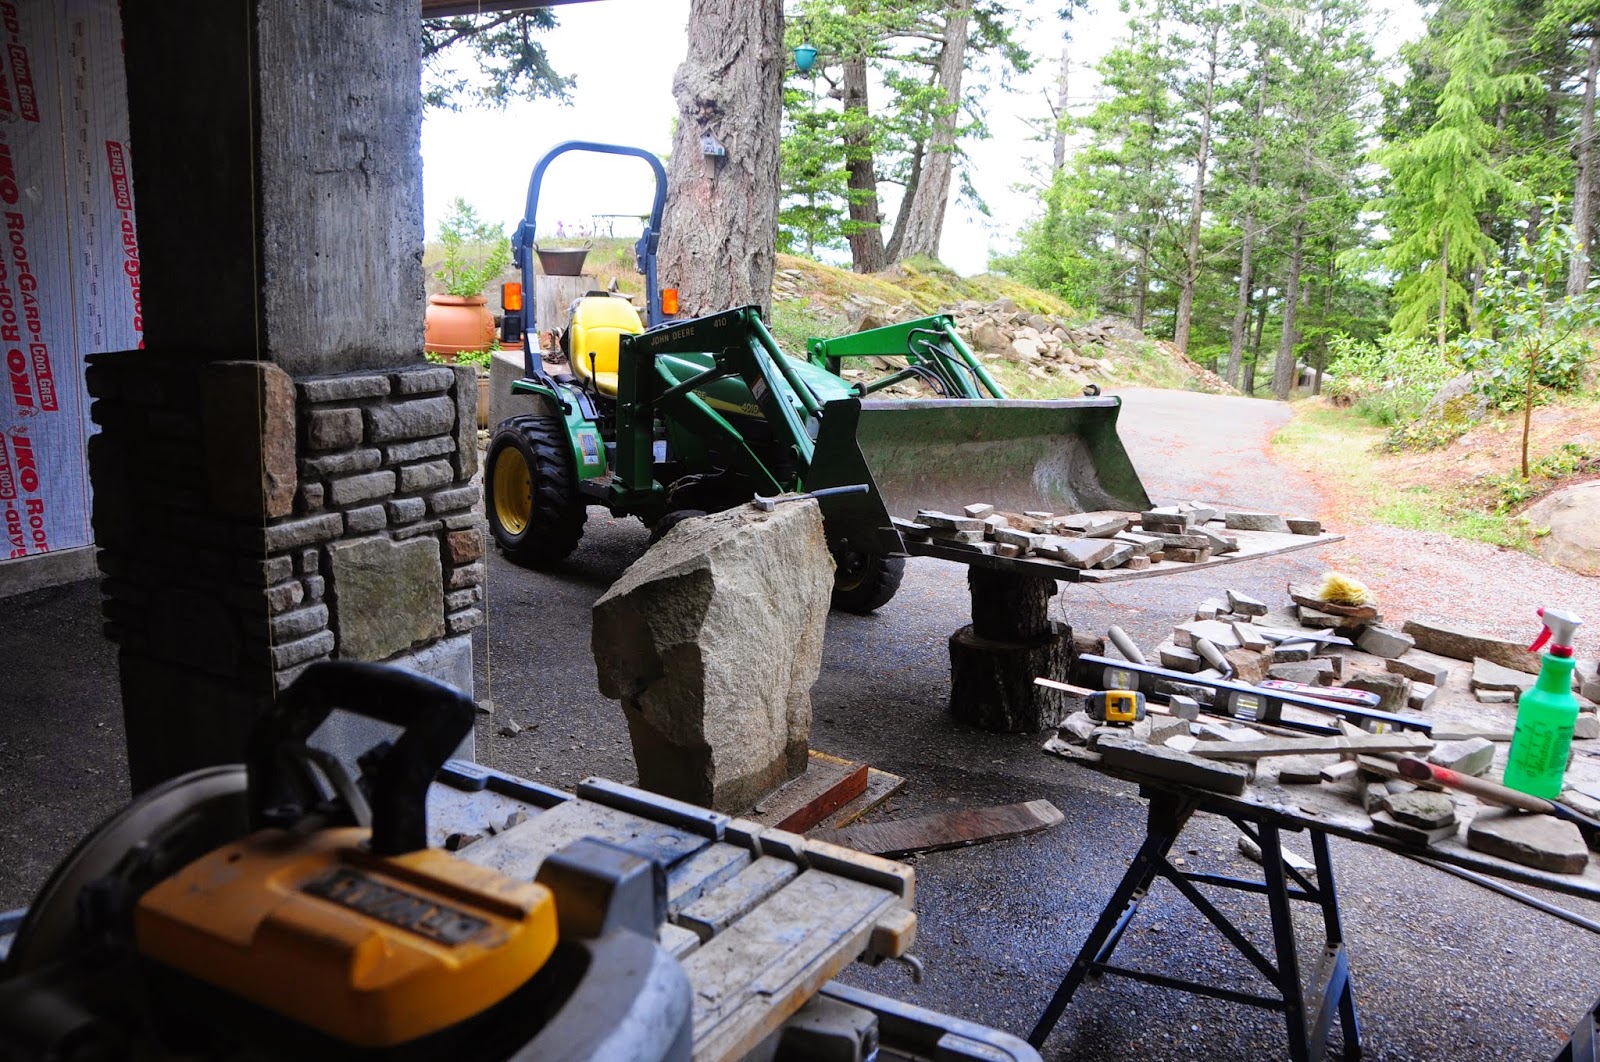
This is just a general shot of my work space. Lower left is the DeWalt rock saw... the pedestal stone standing between the post and tractor is my chipping stone.  You need a rock that one can use like an anvil that is big and solid to support the rock when you are chipping on it.  The tractor with it's extended bucket not only brings the rocks to the site, but doubles as another table while I look for the next piece to put into the puzzle.  

That is how I look at this project. It is one giant puzzle, and I am constantly looking for the best rock to use next to make the design interesting. I can not believe it took me parts of four days to get this little bit of rock work done.


Another one of my big dreams is do back packing... I really want to do the Westcoast Trail.  So before we left Tucson I bought most of the gear... the tent, sleeping bag, air mattress backpack, etc.

I wanted to set it up the tent here at home before going out with it... so last night looked like the perfect time to give it a whirl. I set it up on the small plateau that is in our yard on a plateau just east of the house.

It is a wonderful little tent... very light weight and comes in two parts.  the inner tent is basically the fool proof insect netting.  and then you have the rain protection that goes over it, but doesn't touch the netting.  It took me a little to figure out how it all works, but it is wonderful. I put in the sleeping bag and blew up the air mattress. Got a couple of pillows from the house and my Sudoku book with the book light. I was set for the night.


I thought I had picked a pretty level spot, but as you can see from the picture, it was certainly not level. Just as I was falling off to sleep I remembered that I didn't do the final step in the rock project for the day... I hadn't washed the rocks.  I had chinked most of them and already brushed them with the whisk broom, but I always wash them the end of the day to make it ready for the final wash with muriatic acid when the job is done. (The acid does a great job of removing any unwanted cement on the rocks that is just too persistent to ordinary washing... and it is ugly smelling stuff to work with.)

So I got dressed and went back to the house and did the washing of the rocks and came back to bed. It only took a few minutes since the joints were already chinked. (cleaned out) But I had trouble going to sleep, so did a little Sudoku. For the next couple of hours I would do a little Sudoku, feel drowsy and put the book down... but couldn't get to sleep so would turn on the book light and do some more Sudoku. I hadn't been to sleep very long when I woke up needing to take a whiz. This is the time of the night that I customarily take my Thyroid pill... but I didn't bring the pill or even any water to the tent... and I was really thirsty. But, I thought I could do it later.  

As I lay there trying to go back to sleep, I was not liking the slope of the ground under me... and then I really needed to brush my teeth... too much onion with hot dog and my mouth felt like the inside of a tennis shoe.  Then I got a whiff of my BO... and that did it.  I really needed to take a shower. For me to say that you know I had to smell really bad.

So I said, enough for one night out here. I'll try this again on the level with more favourable conditions.  I need to get some sleep. So I got dressed, went into the house, had a shower, brushed my teeth, took my Thyroid pill, had a big drink of water and finished the night in a comfortable bed.

I heard someone say that their "Sleep Number" is six... that is six glasses of wine.

"Camping is natures way of promoting the motel business." -Dave Barry

Sunday, May 10, 2015

A New Base for the Water Tank

It is All About the Base! ... the Base! ...the Base! It's all about the Base!

The base for this water tank should never have been made of wood... but it has lasted almost 30 years.


I was all set to re-do it last summer/fall... but the double hernia put that plan on hold until the surgery was healed... so it was pushed to the top of the list for this spring.


You can see how the wood has rotted and is really sagging.

Before we took this all apart, I hooked up a string of garden hoses to our neighbours house so we could still live normally... flush toilets and have showers until we we got it all done.


I first had to disconnect the electrical and cut the pipes. There is an electric float switch inside the tank that turns on the pump when the water level reaches the minimum... and there was a couple of heat tapes wrapped around the inlet and outlet pipes.


Once again Johnny to the rescue! The empty tank is not heavy... just awkward and it has no handles.  So with a nylon tow belt I rigged up a way to hold the tank tight to the tractor bucket. Couldn't have done it without my handy bucket extension to carry the tank.


This little four-wheel drive tractor just slowly marched backwards down the hill to the orchard level, where it was easy to take it over to a convienent spot so we could wash it out and clean up the inside.


This looks like a good place to do the wash up... 


close to water and the power washer.  You can see the white supply pipe still standing on the ridge behind the tractor.


I tried to clean it up with the power washer without getting inside the tank... but I couldn't do a good enough job without climbing right inside and doing some "hands on" cleaning.


What rusty sediment came out from the bottom of this tank.  This is likely the first cleaning since it was installed in 1987... about 28 years ago.


So I totally suited up, with googles, and climbed inside with the power washer wand. Once I had done a careful power wash, I had Shirley bring me 3-M scrub pads and towels to wipe it all down and dry it. There wasn't' a speck of anything left inside when I was done!


The access hole is just under 15 inches, so I had to make a custom ladder to use to get in and out of the tank. I just barely could get back out.  Where there is a will there is a way.


Next I headed up the hill to take that rotten platform apart.


At first I planned to just take it all to the burn pile... but as I was pulling the nails and removing the planks, I decided to use four of the best boards to make the form for the concrete pad.


After levelling the ground and building a six-foot square form, I cut some 45 degree corner blocks and then bent and tied the rebar in place. I forgot to take any photos of the intermediate steps... but just as I delivered the first load of concrete I realized I had not documented the rebar and formwork. 


We set up the cement mixer near the gravel pile. Shirley took the lead in running the mixer and I did the delivery and concrete placing and finishing. Johnny transported the concrete to job site.


I could only get the tractor to the one side of the slab, so had to drag the concrete across with a rake to fill the entire form.


It took about a dozen mixer loads of concrete to do the job... it sure beat having to wheel those heavy wheelbarrows up the hill!


Since the final concrete finishing was done just after sunset, this beautiful slab had to wait for the next day for the photo capture.


Most of the slab would be covered with the water tank, so I focused on getting a nice border edging. I let this sit and cure for three or four days before putting any load on it.


It was tricky to get the plumbing re-fitted.  The tank was now 8-9 inches lower than before when it was elevated on a timber platform.  The electrics were no problem to get back together.


We tested the old heat tapes... neither of them were any good.  This explains why we were having some freezing problems. I had purchased three different lengths of heat tapes, not knowing what size I really needed. Home Depot is great about taking things back... so I always try to prepare for the unexpected.


I used three different products to wrap the pipes. The thin reflective tape first... then after winding the heat tapes around and securing it with tie-downs, I then wrapped the 5 inch insulation over the heat tapes.  The final application was the foam adhesive tape. 


The longest inlet pipe got a 4-inch drain pipe sleeve final wrap, as before.

It was a thing of beauty to see the water come pouring in when I turned on the breaker for the well pump. This 500 gallon tank fills up in just over an hour.

Thank you, Shirley for taking some of the photos. My apology for not getting a photo of you on the shovel at the cement mixer. I know it was hard work. You are my Proverbs 31 wife!

The best news is that this base will not rot or deteriorate, and will never have to be redone again.

"Why is there is never enough time to do things right, but there is always enough time to do it over?"