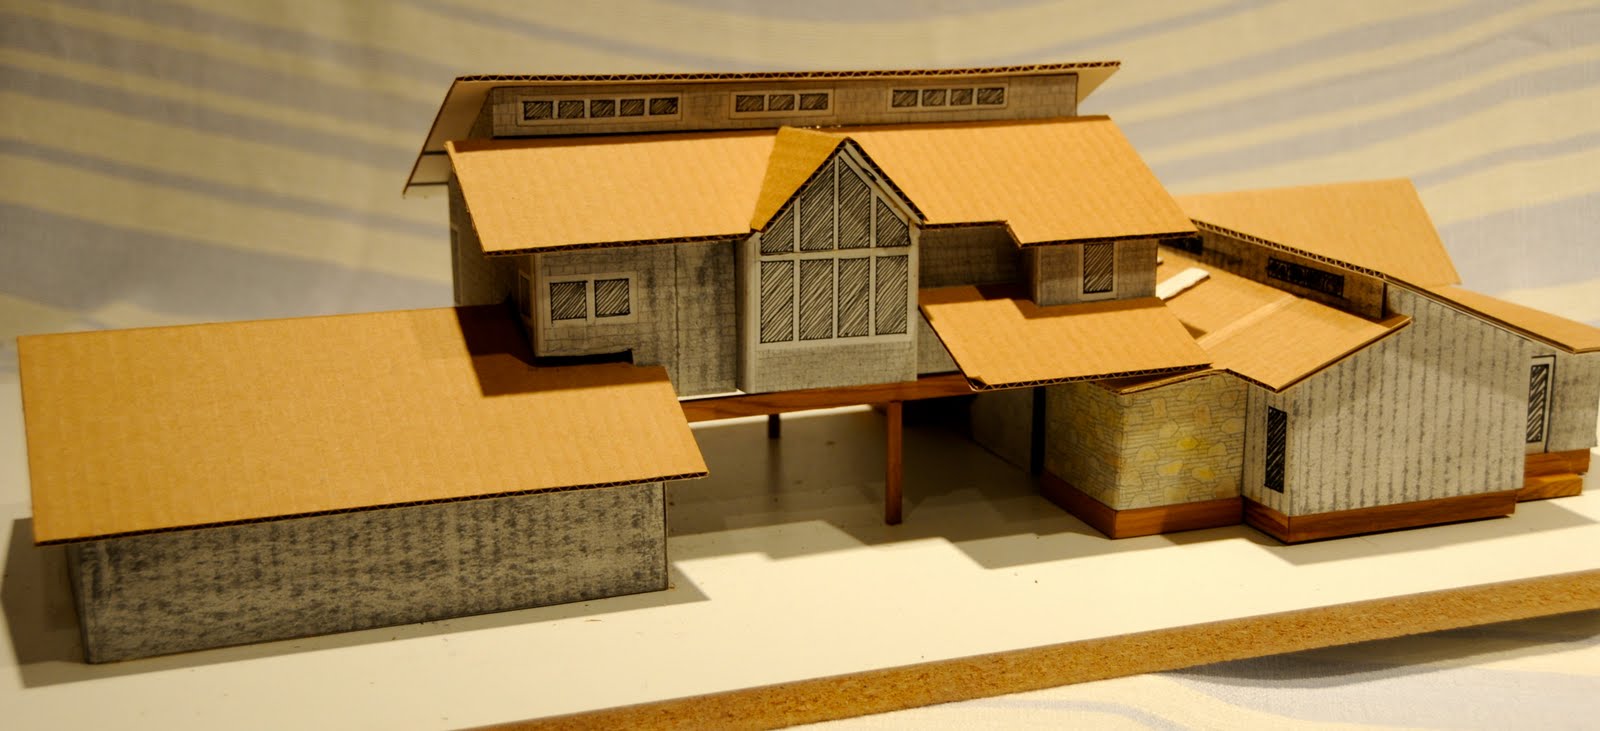
The last few weeks before we both left for a little holiday I have been pushing to complete a model of what our next renovations will look like. We are planning to build a carport to connect our house and garage... and put a studio 22 x 36 feet above.
We want to be sure that this "addition" will tie into the existing residence and garage and not look like an "add on" but rather give the impression that this was the way it was designed to be from the very beginning.
I just recycled old cardboard bankers boxes... we had plenty of these left over from our Acorn Homes days... so I selected some white boxes for this purpose. They were white on one side and the normal brown cardboard colour on the other side. The brown cardboard in this photo is the 1/4 inch scale footprint of our existing house around which I will attach the walls. With a black marker I outline and darken the windows.
I discovered that using a charcoal stick on the corrugated cardboard I could very quickly achieve the effect of the vertical channel cedar siding on our house. Here I am colouring the last section of walls to be attached to the floor plan in the foreground.
Once all the walls were in place I cut out the roof pieces and attached them.
Before gluing the model of the house to a base I shot the levels of our existing house and garage. The garage slab is 24 inches below the main floor of the house... so that meant I needed to raise the house 1/2 inch before attaching it to the base so the model would reflect the true elevations... hence the 1/2 inch cedar foundation you see here.
Here the house and garage are now positioned at the right distance apart and at the correct height in relation to each other, ready to receive the model of the new addition.
But first I must make the new pantry, the stairs to go up to the new studio and a generator room. Later we learned that we could not have a gas generator attached to a residence, so we had to delete this room or use it for something else... like maybe a larger closet for our master bedroom.
This is Plan A... the first effort to show what I thought was the best solution for the studio and loft over the carport. My primary negative reaction to this plan was the high vertical ends on the studio walls. This plan had a loft over the right end of the studio with stairs to loft that followed over the first flight of stairs. I did not like the feeling of entering the studio with a 7-foot ceiling for the first 12 feet or so. The lower ceiling was because of the loft over which came up to the large window seat dormer.
To overcome the feeling that this studio/carport was an add-on I thought it might help to extend the studio over the top of the garage about 6-feet...
And I really liked the way this idea worked out. I also came up with another way to tie the roof over the new master bedroom closet (which I show with stone facing). This became Plan B.
As much as both Shirley liked this plan in general, I told Shirley that I would still make another model with the roof following the same angle as the main house, instead of at right angles as Plan A and B are.
With the post and beams for the carport in place, it is pretty easy to interchange the different modules.
So here is Plan C. We really liked the feeling of the way the roof lines complimented the original house. This plan has a great feeling as you come up the stairs and enter the studio... you see the high vaulted ceiling immediately and the loft is across the back half of the studio, opposite the big studio front windows.
Major disadvantages of this design are that it does not have any clerestory windows, so doesn't tie in as well to the original house. The symmetry of the roof forces me to move the the support posts closer to the existing garage so that they can carry the central beam at the top of the roof... and that makes access to the left side of the carport more restricted... likely too tight to get our F-350 truck in and out.
So, it looks like we will still have to make another model and try to correct the deficiencies.
This is Plan D... the drumroll please. I tired to correct all of the deficiencies of all the other plans. It has clearstory windows protected from the brightest sun (north facing windows.) It is a good marriage to the existing house... the roof lines are a continuation of the main house roof line. The studio overlaps the garage 6-feet. I will be able to lift the studio roof enough to take that notch out where it intersects with the garage. One of the nicest things is the great feeling upon entry to the studio... where you will immediately see the total vaulted ceiling upon stepping into the studio, since the loft is primarily to the rear of the studio, with a small section of loft over the stirs and bathroom... making an L-shaped loft. Access to the loft will be with a library ladder that will be moveable as required where needed... so that will save the area previously needed for stairs.

This is the other side of the studio addition. We plan to have a door onto a small deck, which is really the roof of the new pantry. The circle near the peak is a 3-foot bubble window in the loft. We think the grandkids will love it.
With the roof removed you can see the sleeping loft, which is basically 10 x 10 with a height of from about 6 to 9 feet high and have adequate handrails. It will be separated from the storage part of the loft which is over the stairs and bathroom.
Here you can see the stairs coming up from our front entry steps. The bathroom is immediately to the left, over our new master bedroom closet.
The bottom line is that both Shirley and I are really pleased about the way this plan feels and works.
Our last day before leaving on our trip away from our island I had a meeting with the building inspector on site to get an understanding of the requirements here to get a building permit. Later in the day I had a two hour meeting with our local roofer and he educated us in the pros and cons and costs of several possible options. We plan to redo our entire house and garage with the same product we pick for the new addition.
Building something new is always exciting... and this summer things will be very exciting for us on Mayne Island.
"The doors we open and close each day decide the lives we live." -Flora Whittemore