I cut the pavement last Friday and dug it up... but there was lots of extra work on this excavation that was not on the others. Since the laundry room cantilevered over the foundation about 16 inches, a makeshift brick wall that was to keep the planter dirt contained had to be removed.
Also, the front steps hung over into the space where the new pantry wall had to go... so I had to cut it off. Problem was the solid rock steps were over 7 inches thick and my diamond saw blade, which is 12 inches actually only cuts about 4 inches. So that left a little chisel and hammer work. I also cut up the planter footing into liftable blocks so I could dispose of them in my favourite fill site behind the greenhouse.
Victory at last and was able to pack away the unwanted foundation and step blocks.
After working a day digging mostly by hand after loosening the dirt up with the front end loader, I came up with a way to go further into the excavation with the tractor using a pile of short 2 x 8 boards.
It was amazing how the four-whell drive allows you to do things you could never do without it.
Shirley zoomed in to capture this shot of my bandaged kneecap. When I caught my toe on the edge of the pavement as I was coming out of the shallow stairway excavation number 6 on Sunday evening, I not only banged my knee up pretty good, but I got a nasty crunch on my favourite zoom lens... which is now in the Victoria Camera Repair shop.
It was no ordinary trip and fall... I had so much momentum that as the ground was coming up to meet me I let go of the camera and folded into a summersault... the end of which still ended up skinning my knee and ripping a good hole in my jeans. I wore shorts most of this weeks since long pants irritated the bandage and gave me grief.
I finished Number 7 today... over 30 inches below pavement on the outside, with washed bedrock readily visible. I salvaged several loader buckets of sandstone rock for future walls... but there was one very heavy and ornery rock that was too far under the pavement to readily move. A chain around it to the front end loader could not budge it... so it will become part of the footing.
I did the calculations to see at what elevation the pantry floor would end up... and we decided to have a 6 inch step down and use 8" floor joists. The bottom of the level is where the top of the floor will one day be.
Most of the photos in the blog post were done by Shirley... and she caught me feeling pretty happy to have all the excavations completed today! All done mostly by hand... and not a single broken service line.
"Everyone who's ever taken a shower has had an idea. It's the person who gets out of the shower, dries off and does something about it who makes a difference." -Nolan Bushnell
Thursday, July 14, 2011
Monday, July 11, 2011
Excavating for the New Addition
After completing most of the excavations I set up the model in the driveway between the house and the garage and took this shot with the real trees in the background.
It is going to take quite a bit of work to complete this project, but we will just do what we can every day until we see it thru. Here you can see where I have cut the pavement and started excavating.
I have numbered this plan to show each individual excavation. Each one is unique. Number 1 is located inside the existing garage and required cutting the concrete slab so that I could dig down to bedrock. Number 2 is outside the garage and inside gravel path contained by a rock retaining wall. Numbers 3 and 4 are in the middle of the driveway and must carry about 35,000 pounds. Number 5 will be a closet extension for the master bedroom. Number 6 is for the stairway to the second level... and Number 7 is for a pantry which will be accessed off the laundry room.
The garage floor concrete was cut 28" by 36" and we found some huge boulders that are very tight and immoveable. I may still have to try to widen where possible before drilling into these rocks and pining them together with rebar.
Here is another angle on Number 1 taken from the other side.
Number 2 has been excavated 4 feet wide and is 54 inches between the garage and the rock wall... about 36 inches deep... and I expect to see a 12 inch thick footing 42" by more than 60"... the full distance from under the slab to under the rock retaining wall.
The garage is a slab on grade with no footing or foundation... so I have dug under the slab 8 inches so that I can drill into the slab to tie in rebar to the new foundation and footing. The centre of the post is 36 inches off the garage wall. The black 3/4" poly pipe is water supply for irrigation. The yellow level is 48 inches long.
Both Numer 3 and 4 were cut 36 inches square. This was the tightest material of all the excavations... hence I stopped going deeper at 22 inches.
It took me 90 minutes just widen the base three inches to 42 inches square to receive a 12 inch high footing... that is how tightly packed this gravel is.
This hole was much easier to dig as it was full of many rocks, which I separated out and saved for future rock facing, which I plan to do on the posts supported by this footing an foundation.
This base is undercut to receive a 48" square by 12" thick footing... and the bottom is 28 inches below the pavement.
I took this photo to show not only the amount of rock, but the size... the largest ones are already loaded into the tractor bucket. A few of these rocks came from the hole Number 2 by the garage... but one day many of these rocks will graduate to a place of honour in rock facing on these posts or the house.
Number 5 is the master bedroom closet expansion... and it all is down to bedrock. Only where the service pipes are laying on the bedrock will I cover with sand and soil so the concrete will not touch them. Minimal footings here will be used to level up the base so that a standard 24-inch plywood form can be used.
Knowing there were electrical, phone and water service lines in this area, I choose to dig most all of this area by hand... it took most of two days.
Under the stairs we plan to set up our recycle department... which will be on a concrete slab on grade. But next to the house at each end of the stairs that go up we will need support for posts that will carry a double truss joist the will support the outside wall and roof joists.
There still is some excavation to complete here, regardless of if I do slab on grade or floor joists. From the steps to the left there is a cantilever... so to contain the planter next to the house bricks were stacked under the outside wall. The planter footing 24 inches away from the house will be removed if this is going to be crawl space... which it likely will be.
As the sun was setting we look back from the future pantry towards the garage.
From the pantry side we look at the model again.
It is going to take quite a bit of work to complete this project, but we will just do what we can every day until we see it thru. Here you can see where I have cut the pavement and started excavating.
I have numbered this plan to show each individual excavation. Each one is unique. Number 1 is located inside the existing garage and required cutting the concrete slab so that I could dig down to bedrock. Number 2 is outside the garage and inside gravel path contained by a rock retaining wall. Numbers 3 and 4 are in the middle of the driveway and must carry about 35,000 pounds. Number 5 will be a closet extension for the master bedroom. Number 6 is for the stairway to the second level... and Number 7 is for a pantry which will be accessed off the laundry room.
The garage floor concrete was cut 28" by 36" and we found some huge boulders that are very tight and immoveable. I may still have to try to widen where possible before drilling into these rocks and pining them together with rebar.
Here is another angle on Number 1 taken from the other side.
Number 2 has been excavated 4 feet wide and is 54 inches between the garage and the rock wall... about 36 inches deep... and I expect to see a 12 inch thick footing 42" by more than 60"... the full distance from under the slab to under the rock retaining wall.
The garage is a slab on grade with no footing or foundation... so I have dug under the slab 8 inches so that I can drill into the slab to tie in rebar to the new foundation and footing. The centre of the post is 36 inches off the garage wall. The black 3/4" poly pipe is water supply for irrigation. The yellow level is 48 inches long.
Both Numer 3 and 4 were cut 36 inches square. This was the tightest material of all the excavations... hence I stopped going deeper at 22 inches.
It took me 90 minutes just widen the base three inches to 42 inches square to receive a 12 inch high footing... that is how tightly packed this gravel is.
This hole was much easier to dig as it was full of many rocks, which I separated out and saved for future rock facing, which I plan to do on the posts supported by this footing an foundation.
This base is undercut to receive a 48" square by 12" thick footing... and the bottom is 28 inches below the pavement.
I took this photo to show not only the amount of rock, but the size... the largest ones are already loaded into the tractor bucket. A few of these rocks came from the hole Number 2 by the garage... but one day many of these rocks will graduate to a place of honour in rock facing on these posts or the house.
Number 5 is the master bedroom closet expansion... and it all is down to bedrock. Only where the service pipes are laying on the bedrock will I cover with sand and soil so the concrete will not touch them. Minimal footings here will be used to level up the base so that a standard 24-inch plywood form can be used.
Knowing there were electrical, phone and water service lines in this area, I choose to dig most all of this area by hand... it took most of two days.
Under the stairs we plan to set up our recycle department... which will be on a concrete slab on grade. But next to the house at each end of the stairs that go up we will need support for posts that will carry a double truss joist the will support the outside wall and roof joists.
There still is some excavation to complete here, regardless of if I do slab on grade or floor joists. From the steps to the left there is a cantilever... so to contain the planter next to the house bricks were stacked under the outside wall. The planter footing 24 inches away from the house will be removed if this is going to be crawl space... which it likely will be.
As the sun was setting we look back from the future pantry towards the garage.
From the pantry side we look at the model again.
Saturday, June 4, 2011
Bits of Last Weekend -1
We are always delighted when our kids and grandkids come to visit us on Mayne Island... and to have them all home at the same time is pretty special.
Sherilee, Alan and Seth arrived first and on Sabbath afternoon our walk to Bennett Bay provided many photo opportunities.
I asked Seth to look into this hollow log.
I took this shot of Georgeson Island from the point.
Looking north towards Vancouver the shipping docks and ferry terminal doesn't seem all that far away.
Everyone was into taking pictures.
And sometimes camera's were shared.
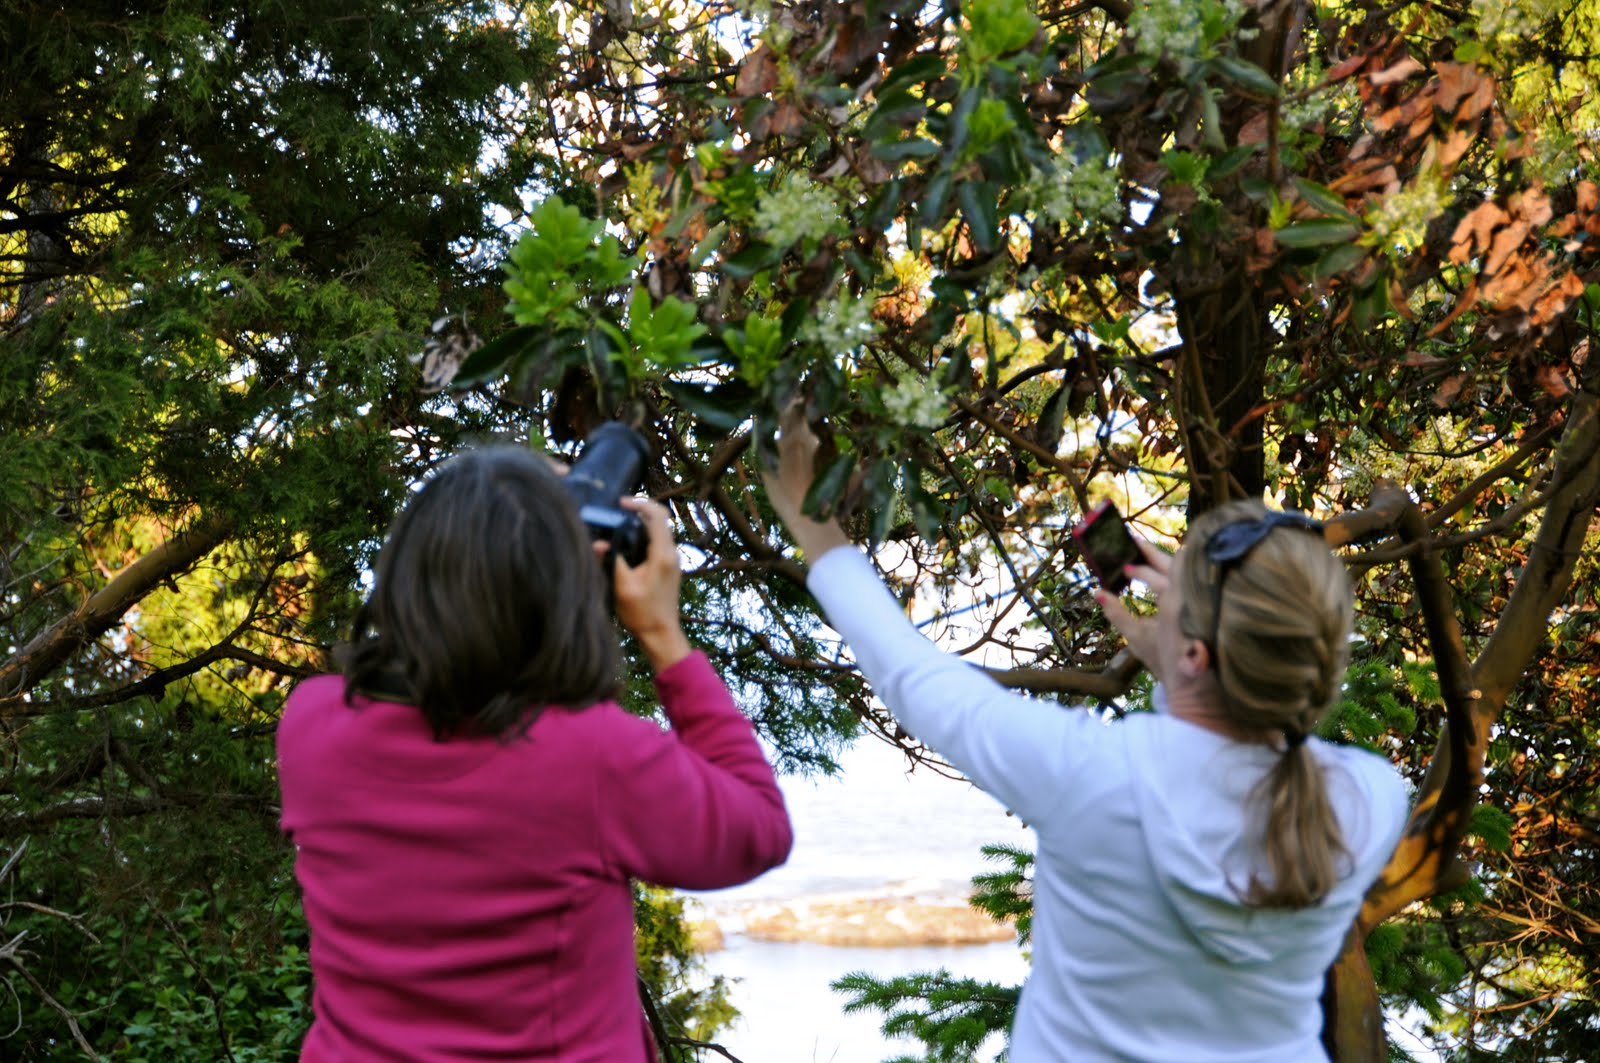
Shirley and Sherilee were excited to see the arbutus tree was in bloom...
Have you ever seen these blossoms up close before?
Meanwhile Seth carved his identity into another arbutus.
Isn't this a lush, green time of the year?
As we were walking out the last rays of sunshine added yellow to the trees.
Looking back into the sun coming thru the trees.
Sherilee, Alan and Seth arrived first and on Sabbath afternoon our walk to Bennett Bay provided many photo opportunities.
I asked Seth to look into this hollow log.
I took this shot of Georgeson Island from the point.
Looking north towards Vancouver the shipping docks and ferry terminal doesn't seem all that far away.
Everyone was into taking pictures.
And sometimes camera's were shared.
Shirley and Sherilee were excited to see the arbutus tree was in bloom...
Have you ever seen these blossoms up close before?
Meanwhile Seth carved his identity into another arbutus.
Isn't this a lush, green time of the year?
As we were walking out the last rays of sunshine added yellow to the trees.
Looking back into the sun coming thru the trees.
On the way home we stopped at the Lighthouse Park at Georgina Point. Seth wasted no time before heading down to the water.
While I got focused on shooting a few flowers...
And sunlight maple leaves...
Alan and Seth were scrounging for starfish and sea life around the rocks.
It was a lovely afternoon to be on or near to the water.
Labels:
Alan,
Bennett Bay,
Georgina Point,
hiking trail,
Lighthouse Park,
Seth,
Sherilee
Pickleball Comes to Mayne Island
One of the highlights of my time in Tucson this past April was playing pickleball with Lorne and the other retired guys every morning between 8:30 and 11:30 AM. So, I have been waiting for the opportunity to have someone to play it with since coming home.
But where could we play?
And what could we use for a net?
I had picked up a starter package in Tucson with two wiffle balls and two paddles.
Shelby has ordered online an official pickleball net for Father's Day...
But I was anxious to not miss the chance to play while the guys were home for the weekend.
So, I went to my scrap pile and found some weathered half-inch plywood from which I could make a couple more paddles so that we could play doubles right away.
So we just took a short rope and and tied one end to the rear door handle of our car... which just happened to be about 36 inches high... and the other end we put thru the rear door and closed the door on it at the same height.
Soon Seth and I were batting the ball back and forth... having a great time.
I don't have a picture of the next stage of development, which was adding the masking tape to the pavement to create the serving zone and the rear limit line. This was important so we could play a game and know if our serves were good or our shots were too long.
In no time at all we were in the throws of a serious game of pickleball.
Shelby came out and saw us having such a good time with next to nothing for equipment and said,
"Plywood for homemade paddles... 50 cents.
Rope for net... 75 cents.
Whiffleball... 90 cents.
Cars to hold up the rope... eighty thousand dollars."
Yes... and I might add, "A grandson to play pickleball with... Priceless!"
On the U.S. Memorial Day Seth and I invited Shelby and Alan to join us in a match at our Mayne Island Tennis courts. With a new roll of green masking tape and a measuring tape we very quickly laid out an official pickleball lines and were into some serious competition.
We played hard for a couple of hours. Our only problem was we didn't remember to bring water. So I volunteered to go and get some. As I was turning the car onto the street I noticed the neighbour watering her newly planted grass... so I backed up and asked if that water was good for drinking.
She said it was great water for drinking and invited us to have a drink from the hose.
As we were driving home we were wondering how best to find out if there were other people on Mayne Island who might like to play pickleball. That will be my next challenge.
But where could we play?
And what could we use for a net?
I had picked up a starter package in Tucson with two wiffle balls and two paddles.
Shelby has ordered online an official pickleball net for Father's Day...
But I was anxious to not miss the chance to play while the guys were home for the weekend.
So, I went to my scrap pile and found some weathered half-inch plywood from which I could make a couple more paddles so that we could play doubles right away.
So we just took a short rope and and tied one end to the rear door handle of our car... which just happened to be about 36 inches high... and the other end we put thru the rear door and closed the door on it at the same height.
Soon Seth and I were batting the ball back and forth... having a great time.
I don't have a picture of the next stage of development, which was adding the masking tape to the pavement to create the serving zone and the rear limit line. This was important so we could play a game and know if our serves were good or our shots were too long.
In no time at all we were in the throws of a serious game of pickleball.
Shelby came out and saw us having such a good time with next to nothing for equipment and said,
"Plywood for homemade paddles... 50 cents.
Rope for net... 75 cents.
Whiffleball... 90 cents.
Cars to hold up the rope... eighty thousand dollars."
Yes... and I might add, "A grandson to play pickleball with... Priceless!"
On the U.S. Memorial Day Seth and I invited Shelby and Alan to join us in a match at our Mayne Island Tennis courts. With a new roll of green masking tape and a measuring tape we very quickly laid out an official pickleball lines and were into some serious competition.
We played hard for a couple of hours. Our only problem was we didn't remember to bring water. So I volunteered to go and get some. As I was turning the car onto the street I noticed the neighbour watering her newly planted grass... so I backed up and asked if that water was good for drinking.
She said it was great water for drinking and invited us to have a drink from the hose.
As we were driving home we were wondering how best to find out if there were other people on Mayne Island who might like to play pickleball. That will be my next challenge.
Friday, June 3, 2011
Common Miracles Abound
We have been so busy it has been hard for me to stop and blog.
But I've heard it said, "Better late than never." So here goes.
Spring is kind of a "Common Miracle," right? I think we have come to expect a warm spring... and then when we get a really cold, wet spring like this year we are so happy to get a warm, sunny day.
Along with spring comes flowers... and what greater joy is there than to see flowers growing in your own garden... which is another "Common Miracle." There is nothing we could do to make those seeds, or bulbs burst forth into a plant that blooms. And so I see the face of God in every flower. It is His work of art that brings so much enjoyment to us.
They are on the ridge on the east side of our house... and I get a lot of joy out of seeing them there.
"The best place to seek God is in the garden. You can dig for Him there." -George Bernard Shaw
"The apple blossom exists to create fruit; when that comes, the petal falls." -Kabir
"Where flowers bloom, so does hope." -Lady Bird Johnson
"We say we love flowers, yet we pluck them. We say we love trees, yet we cut them down. And people still wonder why some are afraid when told they are loved."
These rhodies are smiling on the day, enjoying the sunshine and passing on their love... happy to see me taking their picture.
Shirley saw me laying on the ground to take this photo of these bluebells...
Later that morning I caught her taking a break from weeding... still with her knee pads on... laying on the hard pavement trying to get a close-up shot of the same bluebells.
We watched a very interesting movie on Netflix... "Greenfingers." If you have any interest at all in gardening you will certainly appreciate this movie, based on a true story about some high security prisoners in Britain who got into gardening... and found new meaning in life. Click here to view the movie trailer. It is a tear jerker.
For some time now we have wanted to take out several trees that shade the sunshine from our greenhouse... but since the trees were so big and so close to the buildings and our power line, I was afraid to tackle the job without a professional... one mistake could be very costly.
Meet Dr. Daylight. We hired Ian Middlewitch, a tree service man from Saturna Island, who came last week and in about five hours dropped 10 difficult trees... he also cleaned up dead branches on several tall trees that I could never reach, like the one in this photo.
There was one tree that we found after falling was rotten in the middle. If it had come down in a storm it would have taken out our power and maybe our water tank. It was the toughest one to bring down.
We worked together to get most of the trees on the ground. Sometimes Ian would climb up high into the tree and attach an 150-foot heavy rope. I would then attach it to a block on another tree down the hill, in the direction the tree was to fall and with my John Deere tractor I would pull on the rope to insure the tree did not fall the wrong way. Just one problem. On a really big tree that was leaning backwards, I did not tie a fail-proof knot... and as I was pulling with the tractor, the rope came untied. Ooops!
The tree could have gone backwards and into the water tank! But I hollered right away and Ian stopped cutting. The tree stayed upright long enough for us to get reconnected... and we got the tree on the ground safely. After Ian said, "We got a free one there!" It was a miracle that my sloppy knot came undone early enough and not after too much had been cut on the tree or we could have had a disaster. For some reason I missed getting a photo of the crisis.
Ian taught me a new knot after that incident... the bowline knot. Check it out... the website is pretty cool. He said if you ever have to tie a rope around yourself when being rescued, this is the best knot to use. Hope you never have to use it for that... but I will sure use it again for pulling trees or other times when safety is required.
The mess we made in five hours took more than 5 days to clean up. I have so far loaded up my tractor with the bucket extension with 16 huge huge loads of branches and burned them... and I have still have a couple more to pick up before it is all done.
The difference in the daylight in the greenhouse is incredible... it is significantly brighter. Now the plants should really do well. No excuses.
For some jobs is seems like one has to go backwards to reach the objective. This project made a huge mess in the process of achieving the goal, but it was worth it.
Labels:
Dr. Daylight,
flowers Mayne Island,
Greenfingers,
tree removal
Subscribe to:
Posts (Atom)